Thursday, November 21, 2024
DIY Wood Pallet Shed: A Beginner-Friendly Guide to Shed Construction

DIY Wood Pallet Shed: A Beginner-Friendly Guide to Shed Construction
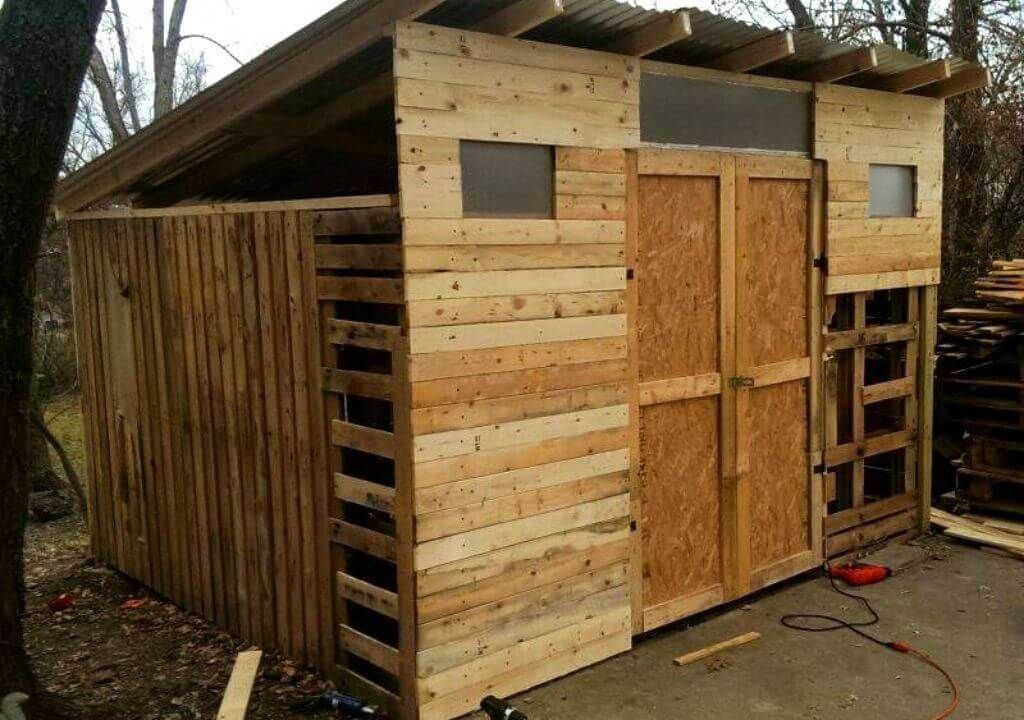
Constructing a shed from reclaimed wood pallets presents a cost-effective and environmentally conscious alternative to purchasing a pre-fabricated structure. This guide provides a comprehensive, step-by-step approach for beginners, emphasizing safety and best practices throughout the process. While utilizing reclaimed materials offers significant financial advantages, careful planning and execution are crucial for a structurally sound and aesthetically pleasing result.
I. Planning and Preparation: Laying the Foundation for Success
Before commencing construction, thorough planning is paramount. Neglecting this stage can lead to significant complications and potential project failure. This phase encompasses several key aspects:
A. Shed Design and Dimensions
Determine the desired dimensions of your shed based on your storage needs. Consider factors such as the number and size of items to be stored, and available space in your yard. Sketch a basic plan outlining the overall dimensions, door placement, and window placement (if desired). Simple rectangular designs are recommended for beginners. Remember to adhere to local building codes and regulations regarding shed size and placement.
B. Pallet Acquisition and Assessment
Sourcing suitable pallets is a critical step. Inspect pallets thoroughly for damage, rot, or infestation. Prioritize pallets constructed from pressure-treated lumber, as this offers superior durability and resistance to the elements. Avoid pallets displaying signs of significant wear, decay, or chemical contamination. Ideally, aim for pallets of uniform size and quality to simplify the construction process. You will need to calculate the quantity of pallets required based on your shed’s design.
C. Site Preparation and Foundation
Select a level and well-drained location for your shed. Clear the area of debris, vegetation, and any obstacles. The foundation is crucial for structural integrity; a concrete slab offers the most robust and durable foundation. Alternatively, you can create a gravel base, ensuring proper leveling and compaction. The chosen foundation must be adequately sized to support the weight of the completed shed.
D. Material Gathering and Tool Preparation
Beyond pallets, gather necessary materials such as: screws, nails, wood glue, weatherproofing sealant, roofing materials (e.g., asphalt shingles, metal sheeting), and any desired hardware (e.g., hinges, door handle, window latches). Ensure you have the appropriate tools: a hammer, saw (circular saw or hand saw), drill, screwdriver, measuring tape, level, safety glasses, work gloves, and a pry bar for dismantling pallets.
II. Construction Phase: Assembling the Pallet Shed
This section details the construction process, assuming a basic rectangular shed design. Adapt these instructions as needed for more complex designs.
A. Pallet Disassembly and Preparation
Carefully dismantle the pallets, removing any nails or staples. Inspect each board for damage and discard any unsuitable pieces. Clean the boards, removing any dirt, debris, or loose splinters. You may need to cut some boards to fit your design specifications. Remember to wear safety glasses and gloves during this process.
B. Floor Construction
Construct the floor frame using the prepared pallet boards. Create a rectangular frame matching your shed's dimensions, securely fastening the boards using screws and wood glue. This frame will provide a solid base for the floor. Lay additional boards across the frame, creating a sturdy and even floor surface. Ensure proper spacing between boards to allow for drainage.
C. Wall Construction
Construct the walls using the pallet boards, arranging them vertically to create a visually appealing and structurally sound wall. Use screws and wood glue to secure the boards to the floor frame. Ensure the walls are plumb and square. For added stability, consider adding vertical supports inside the walls. Repeat this process for all four walls.
D. Roof Construction
Construct the roof frame using pallet boards or other suitable lumber. Design the roof with an appropriate pitch for water runoff. Securely fasten the roof frame to the top of the walls. Install the chosen roofing material, ensuring proper overlapping and sealing to prevent leaks. Use appropriate fasteners for your roofing material.
E. Door and Window Installation
Cut an opening in one of the walls for the door. Construct the door frame and attach the door. Install hinges and a handle. If incorporating windows, create openings in the desired locations and install the windows using appropriate sealant and fasteners.
III. Finishing Touches: Enhancing Aesthetics and Durability
Once the basic structure is complete, several finishing touches can enhance both the aesthetics and longevity of your shed.
A. Weatherproofing
Apply a weatherproofing sealant to all exposed wood surfaces to protect against moisture damage. This will significantly extend the lifespan of your shed and enhance its resistance to the elements. Choose a sealant appropriate for exterior use and follow the manufacturer's instructions.
B. Painting or Staining
Consider painting or staining the exterior of the shed to improve its appearance and provide additional protection from the elements. Choose a paint or stain designed for exterior use and follow the manufacturer's instructions for application. This step adds a personal touch and enhances the overall curb appeal.
C. Interior Finishing
If desired, add interior finishing touches such as shelving, pegboards, or additional storage solutions. This will maximize the usability of your shed and create a more organized storage space.
IV. Safety Precautions: Prioritizing Safety Throughout the Process
Safety should be a paramount concern throughout the construction process. Observe the following precautions:
By following this comprehensive guide, beginners can successfully construct a durable and aesthetically pleasing wood pallet shed. Remember that patience, meticulous planning, and attention to detail are key to achieving a successful outcome. Enjoy the process and the satisfaction of creating a functional and attractive addition to your property.
No comments:
Post a Comment